
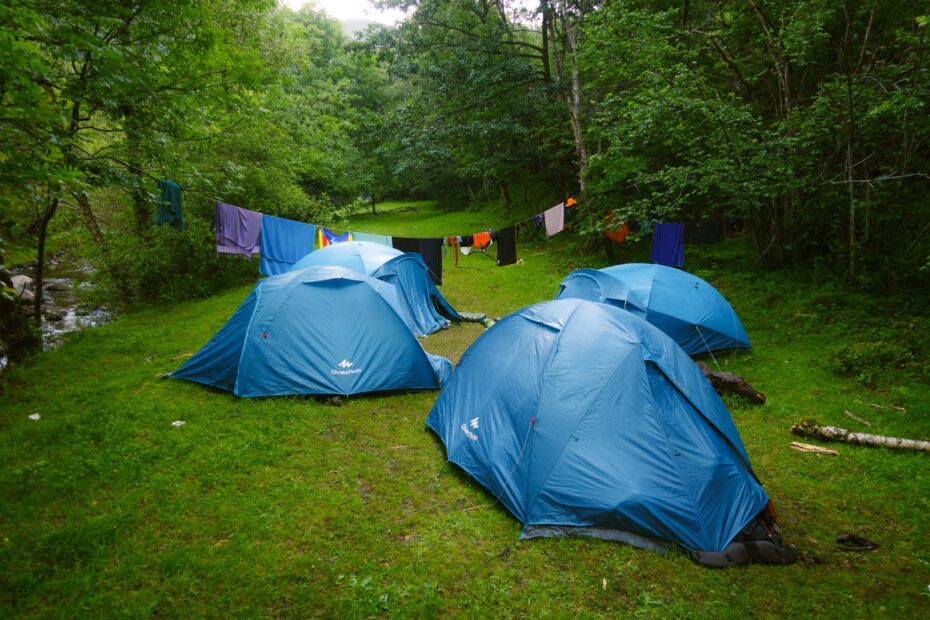
Failed seams, worn coatings, fabric damage, poor pitching, or water beneath the floor can let rain into a tent. Your wet sleeping bag may signal a rain breach, yet it may also have touched an inner wall covered with condensation droplets after a humid night.
You can trace the moisture source, stabilize the shelter during rain, and restore damaged materials at home with a methodical inspection of the campsite, rainfly, seams, floor, and fabric coatings.
Condensation and Rain Leaks Leave Different Clues
Broad droplets across the inner walls point to condensation rather than a single hole or seam failure. Warm air from breathing, damp clothing, and wet ground reaches cooler tent fabric and changes into water on the interior surface.
Your first task is to study the wet pattern before moving bedding or touching the walls. A handprint can smear droplets, while a shifted sleeping pad can cover water that entered beneath the floor.
| Clue | Condensation | Rain leak |
|---|---|---|
| Wetness pattern | Fine droplets across broad interior panels | Tracks, drips, or one concentrated wet patch |
| Weather link | Can appear during a dry but humid night | Appears during rain or wind-driven spray |
| Likely location | Inner walls, roof, and rainfly underside | Below seams, near damage, or beneath the floor |
| Bed contact | Gear gets wet after touching a damp wall | Water lands on gear or rises from below |
Rain leaves a directional trail
Water tracks below a seam, drips from one point, or pools beside a corner after rainfall signal a true breach. Wind can force rain sideways through a vent, zipper area, or loose rainfly edge, leaving a concentrated wet spot that condensation does not produce.
For example, a dry ceiling with one wet line below a factory-taped roof seam points toward seam failure. Wetness beneath your pad after a storm points toward saturated soil, an exposed tent footprint edge, or fabric abrasion on the floor.
A three-part check separates the causes
- Record conditions Write down rainfall, wind direction, humidity, and vent positions before packing the tent.
- Study patterns Look for droplets, drip points, wet tracks, and water beneath your sleeping pad before moving gear.
- Try a dry night Pitch the shelter during dry weather; fresh interior droplets show that condensation can form without rain.
- Inspect contact areas Check where bedding touched the walls, since a damp wall transfers moisture without a fabric breach.
That distinction shapes your next step. Wider ventilation and a towel address condensation, while a seam track or puddle calls for a physical repair.
Once condensation is ruled out, tracing the water’s route identifies the component that needs attention.
Water Enters Through Seams, Fabric, and Rainfly Contact
A seam contains needle holes, so factory-taped seams and seam sealer carry much of the shelter’s water resistance. Tape can lift near corners, while exposed stitching can wick rain through the rainfly, tent body, or floor.
Fabric damage opens direct entry points
Pinholes, punctures, and tears admit rain even where fabric has a strong hydrostatic head rating. That rating describes water-pressure resistance in a new fabric sample; it does not overcome damage from rocks, branches, folding wear, or fabric abrasion.
Worn polyurethane (PU) coating can expose the woven fabric beneath it. A sticky surface, peeling film, and sharp chemical odor point toward PU coating breakdown, also called delamination.
Rainfly contact transfers moisture
A slack tent rainfly can hold water in a sagging panel or rest against the inner tent. Contact between those layers creates a bridge that transfers moisture through the fabric without an obvious hole.
Your tent stakes and guy lines keep the rainfly separated from the tent body. A taut fly sheds rain like a sloped roof, while a loose fly presses wet fabric against the inner wall.
DWR wet-out differs from coating failure
Durable water repellent (DWR) coating causes rain to bead on the exterior fabric. Once DWR wears down, the face fabric darkens and absorbs water, which reduces breathability and adds to condensation inside.
Wet-out does not prove that the waterproof layer has failed. A waterproofing spray from Nikwax can restore surface beading on suitable fabric, but it cannot close a leaking seam or rebuild flaking PU coating.
A dark, soaked-looking rainfly needs inspection before treatment. Check the underside, seam line, and fly tension before working on the exterior surface.
Inspect the Campsite and Rainfly Before Repairing Fabric
Water under the tent can look like a failed floor, so begin with the ground rather than the fabric. Depressions, runoff channels, and saturated soil can hold water against the floor through an entire storm.
The campsite exposes floor problems
- Check the slope Choose ground that sends rain away from your sleeping area rather than toward it.
- Inspect soil moisture Muddy or saturated ground can hold water against a sound tent floor for hours.
- Tuck the footprint Keep every edge of the tent footprint inside the floor outline so rain cannot collect beneath it.
- Skip drainage trenches Select a better site instead of digging channels that damage the campsite.
- Inspect corners Standing water beneath one corner points to drainage before it points to a seam failure.
An exposed groundsheet edge works like a gutter. Rain lands on the visible flap, runs inward, and gathers beneath the floor, where body weight can force it through weakened coating.
Pitching tension changes the result
Stake opposite corners evenly, then tighten guy lines until the rainfly sits clear of the inner tent. Your doors and vents should face away from wind-driven rain where the campsite layout permits.
Continue from the fly panels to seams, zipper areas, and floor corners. Look for lifted seam tape, seam gaps, abrasion marks, pinholes, tears, or wetness gathered around one entry point.
This inspection order answers why is my tent leaking without guessing at the cause. It also stops you from sealing a roof seam while runoff enters beneath the floor.
Dry-Camp Actions Limit Water During Rain
A sagging fly needs attention because it can transfer rain to the inner tent and restrict airflow at the same time. Add a tent stake, tension the guy line, and lift pooled water from outside without pressing wet fabric into the tent body.
Field actions target the source
- Retension the fly Tighten guy lines after rain begins because wet fabric can stretch and lose its air gap.
- Reset loose stakes Drive stakes at an angle away from the tent so guy lines hold tension.
- Clear pooled water Lift standing water off the rainfly without pushing the wet panel against the inner tent.
- Move bedding inward Keep sleeping bags, quilts, and clothing several inches away from damp walls.
- Open high vents Increase airflow through upper vents during breaks in rain while shielding wind-facing openings.
Towels manage moisture but do not repair its source. Wipe condensation from the walls, dry bedding contact areas, and wring towels outside, then keep looking for a seam line or floor entry point.
Temporary patches have narrow limits
Emergency tape works on a small tear only after the fabric is clean and dry. Gear Aid Tenacious Tape is one familiar option, but muddy nylon, wet polyester, and active seam drips weaken a field patch.
Use an overhead tarp as a separate shelter with an air gap above the rainfly. Do not wrap a tarp tightly around the tent, since trapped moisture and fabric contact can worsen condensation; a tarp beneath the tent belongs fully inside the floor outline.
After the weather clears and the tent is fully dry, the remaining remedy depends on what has failed.
Do not cover an active seam drip with random tape or waterproofing spray during rain. Dry fabric and full cure time are part of a lasting repair.
Home Repairs Depend on Coating and Damage Type
Dry materials show their real condition, so air-dry the shelter completely before repair work begins. Brush off soil, clean the target area according to the product label, and identify the fabric coating before opening a sealant tube.
Sealant must match the fabric coating
Silicone-coated fabric needs silicone seam sealer because polyurethane products do not bond reliably to silicone. PU-coated fabric works with polyurethane seam sealer, including products sold under the Seam Grip name.
| Failure | Home repair | Limit |
|---|---|---|
| Exposed stitching | Run compatible seam sealer along the seam line | Fabric must be clean and fully dry |
| Small pinhole or tear | Use a compatible adhesive patch or repair tape | Large tears need sewn repair plus sealing |
| Worn PU floor coating | Recoat after removing loose failing material | Sound base fabric is needed |
| Wet-out exterior | Restore DWR with a suitable waterproofing spray | DWR does not repair seam gaps |
Repair the failure rather than the symptom
Tent seam sealing can restore a sound shelter without replacing it where tape loss or exposed stitching remains limited. Run a thin continuous bead along the seam, spread it evenly, and allow the stated cure period before folding or pitching the tent.
To repair a leaking tent floor, inspect both sides for scuffs and pinholes, then patch local damage. Broadly sticky or peeling coating calls for recoating only where the fabric remains flexible and intact.
Your final check belongs in a dry backyard setup. Spray the rainfly and seams with a hose, inspect the interior after several minutes, and keep water pressure gentle rather than blasting seams at close range.
That test also reveals whether localized maintenance can restore protection or deterioration has become too extensive.
Maintenance and Material Condition Shape the Replacement Decision
A correctly sized footprint and taut rainfly solve more future water problems than another layer of spray. Set your shelter on ground that sheds water, keep the footprint tucked beneath the floor, and leave vents open as conditions allow.
A dry-weather routine finds trouble early
- Pitch in daylight Set up before storms so you can spot rainfly contact and loose guy lines.
- Inspect seam tape Press along taped seams for lifted edges, bubbles, and loose sections.
- Air the tent Dry every panel after trips before long-term storage in a cool, dry place.
- Check the floor Look for pale scuffs and thin spots after camping on gravel or rough ground.
- Refresh DWR selectively Reproof exterior fabric after wet-out reduces breathability, not as a substitute for repairs.
Coleman, MSR, and REI Co-op tents use different fabric systems, so your care label and manufacturer materials identify compatible products. Brand names matter less than the coating type listed for your tent.
Material failure sets a repair limit
Repeated tent leaks after correct setup and compatible repairs point toward broad material failure. Widely flaking PU coating, severely delaminated seam tape, brittle fabric, and seams that reopen after sealing make replacement the sensible choice.
Your time and money belong with restoration where damage remains local, the fabric stays flexible, and the coating still bonds. A shelter shedding sticky flakes across large panels has moved beyond dependable field repair.
Dry-Camp Priorities
Trace the water before sealing anything. Interior droplets call for airflow and distance from wet walls, while a seam track, sagging rainfly, damaged floor, or runoff path calls for a targeted fix.
Your dry night depends less on adding products than on finding the exact route water used. Start at the campsite, move upward through the rainfly and seams, then match the repair material to the damaged surface.
FAQ
Why is my tent wet inside if it did not rain?
Condensation is the usual cause during humid nights with limited airflow. Your breath, damp clothing, wet ground, and a closed rainfly raise interior humidity, while cooler tent walls turn that moisture into droplets that soak gear touching the fabric.
How do I find where water is getting into my tent?
Start with the campsite, groundsheet edges, and water beneath the floor, then inspect rainfly tension, seams, and damaged panels. Your wetness pattern gives the strongest clue: broad droplets suggest condensation, while a drip line or concentrated puddle points to an entry route.
Can I reseal tent seams without replacing the tent?
You can reseal exposed or leaking seams where the fabric remains sound and old tape damage stays limited. Match silicone-coated fabric with silicone seam sealer and PU-coated fabric with polyurethane seam sealer, then allow full cure time before water exposure.
Should I put a tarp under or over a leaking tent?
Place a correctly sized groundsheet beneath the tent with no exposed edges, since visible tarp edges can channel rain beneath the floor. An overhead tarp can shelter the campsite, but your rainfly needs an air gap and should not be wrapped tightly in plastic.
DWR renewal timing
Restore DWR after exterior fabric stops beading water and wet-out starts to reduce airflow. Your schedule depends on use, storage, sun exposure, and washing, while seams and coatings need inspection before waterproofing spray goes on.
Why does my tent leak even when the rainfly is on?
A rainfly cannot stop water where it sags against the tent body, has an unsealed seam, or leaves a vent exposed to wind-driven rain. Tighten guy lines, restore the air gap, and inspect the fly seams before assuming the inner tent has failed.