
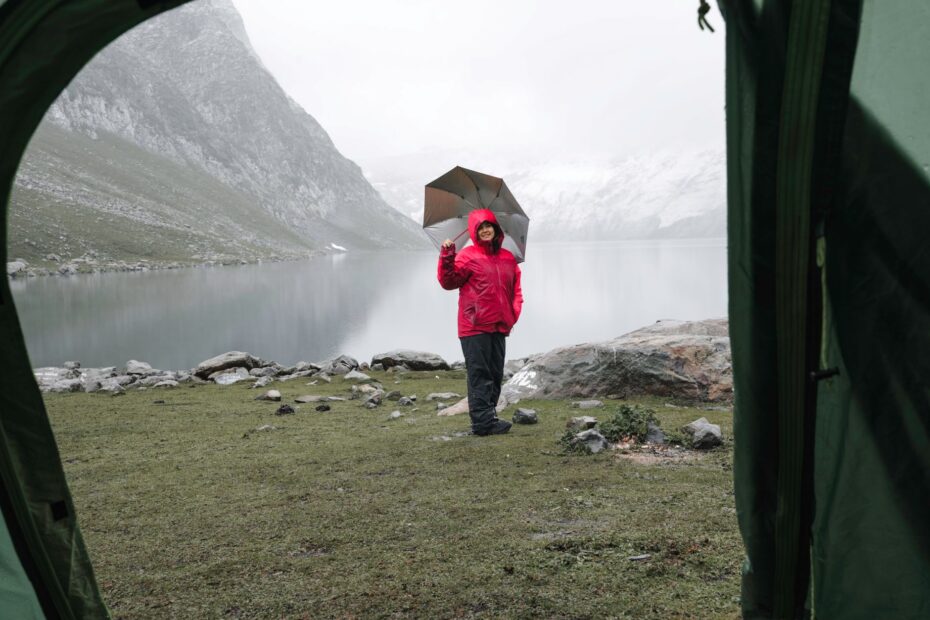
A taut rainfly, elevated ground, an internal pack liner, and sealed dry bags create layered barriers that protect sleeping insulation from rain and ground moisture. These layers block rain, runoff, wet handling, and condensation before moisture reaches your sleep system.
Wet-weather campers need a camp system that protects sleep gear, controls tent moisture, and gives you a practical recovery plan after a soaked day.
Layered Barriers Block Four Moisture Sources
Rain reaches your gear through four routes: direct rainfall, runoff from saturated ground, wet hands during camp chores, and condensation inside the shelter. Your setup needs a separate barrier for each route because a dry rainfly cannot protect gear exposed during packing or entry.
Start with the items that would make a cold, wet night unsafe or miserable. Your sleeping insulation, dry base layers, shelter repair gear, food, navigation tools, and electronics need the strongest protection because each item has a different consequence after getting wet.
Critical Gear Needs Redundant Protection
- Sleeping insulation: Keep your sleeping bag or quilt inside a waterproof stuff sack placed within a pack liner.
- Dry sleep layers: Reserve dry base layers, socks, and a warm hat for sleeping rather than trail use.
- Shelter repairs: Store seam sealer, patch tape, cord, and spare stakes where your hands can reach them quickly.
- Navigation tools: Seal maps, a compass backup, phone power, and batteries inside waterproof storage.
- Food and electronics: Keep food packaging and battery-powered gear away from pooled water and wet handling.
Your rainfly, pack cover, and water-resistant backpack act as outer shields, yet seams, roll-top openings, and shoulder straps still admit water during sustained rain. One missed closure can send water through the full pack, so your inner storage needs to stay dry even after the backpack fabric is soaked.
Do not rely on a pack cover as your main barrier. Water can enter around the harness, gather beneath the cover, or soak your gear during a wet pack-down.
Internal Storage Protects the Pack Load
That need for redundancy starts at the center of your backpack. A pack liner protects the full load after rain reaches the outer fabric, while a cover mainly reduces exposure from above.
Pack Liners and Dry Bags Serve Different Jobs
Line your pack before loading it, then place the bulkiest protected item near the bottom. Your sleeping bag belongs there because it stays sheltered from rain during short stops, wet trail breaks, and camp setup.
| Storage option | Primary role | Where it can fail |
|---|---|---|
| Pack liner | Protects your full pack contents | Punctures and an unrolled opening expose the whole load |
| Waterproof dry bags | Protect separate gear groups | Water enters through a dirty or poorly rolled closure |
| Waterproof stuff sacks | Compress clothing or sleeping gear | Seams wear under heavy compression and abrasion |
| Trash compactor bag | Works as an internal liner | Thin plastic punctures and offers no internal organization |
Roll a roll-top closure down at least three times after pressing extra air out. Dirt, trapped fabric, or one loose fold gives rainwater a route into your storage.
Sea to Summit dry bags separate your gear into useful groups, so you do not expose every dry item during a search. Osprey pack covers help during brief showers, but your pack liner remains the stronger barrier after a long wet hike.
Rainy Access Keeps Sleep Gear Sealed
Put your shell, lunch, map case, pack cover, and small repair pouch near the top. This approach explains how to pack camping gear in the rain without opening your dry sleep system beside a wet trail.
Your daily-access pouch should hold the items needed between camp stops. A closed main compartment keeps rain from reaching clothing, insulation, and food while you look for one small item.
GORE-TEX shells shed rain only while the membrane and outer face fabric remain sound. Refresh a worn durable water repellent finish with a product such as Nikwax, following the garment label before a long wet trip.
Even a well-maintained pack benefits from a campsite that directs runoff away before it reaches the shelter.
Drainage and Shelter Placement Keep Water Away
A sealed sleeping bag still suffers on a flooded tent floor. Choose slightly elevated ground with a gentle natural slope, then check uphill for bare channels, soft mud, and standing water that show where runoff travels.
Low Ground Collects Overnight Runoff
Avoid depressions, dry drainage channels, shorelines, and compacted hollows. During hard overnight rain, these spots act like shallow bowls and direct water beneath your shelter.
Your tent belongs on firm ground where water has room to move around the shelter rather than beneath it. A small change in camp position can separate a dry floor from a puddle collecting under your sleeping area.
Use a tent footprint or groundsheet that stays fully inside the tent floor edge. Material that extends past the wall catches rain like a tray and funnels it beneath the floor.
MSR footprints are cut for matching tents, though your trimmed generic groundsheet works as long as no edge remains exposed. Check every corner after staking the tent because a shifted footprint can extend beyond the floor during the night.
Skip trenches around a tent. Digging damages the site, redirects runoff into new paths, and conflicts with Leave No Trace principles.
Rainflies Need Tension and Sound Seams
Seam sealing fills small stitch holes where factory tape has worn or where a shelter lacks sealed seams. Your tent, tarp, and rainwear may need different seam products because silicone-coated nylon and polyurethane-coated fabrics use different coatings.
Pitch the rainfly taut enough to shed water without touching the inner tent. Fabric contact transfers moisture inward, especially after wind slackens guylines and rain adds weight to the fly.
Check tension after the fabric cools and absorbs rain. A loose rainfly can sag against the inner wall even though the tent fabric has no tear.
Keeping rain outside the sleeping area also depends on handling wet gear before it crosses the tent door.
A Covered Transition Zone Keeps the Tent Interior Dry
Once runoff moves around your tent, the doorway becomes the next weak point. A tarp shelter gives your wet boots, shells, cookware, and pack contents a place to pause before they reach sleeping gear.
Tarps Cover Camp Work Rather Than the Tent Roof
Anchor an overhead tarp with a clear slope so rain drains away from tents, walkways, and gear piles. Your tarp needs space from the tent for airflow, guyline access, and a rainfly that can shed water without contact.
For example, place a 10-by-12-foot tarp beside a two-person tent rather than directly over its rainfly. A low corner facing the wind reduces rain blowback, while the higher side leaves room for standing camp chores.
Keep your stove near an open tarp edge with ventilation above it and no flame beneath low fabric. Rain shelter does not make an enclosed cooking space suitable for stove use.
A Short Entry Routine Protects Bedding
- Shake before entry: Knock water from your shell, pants, and hood before opening the tent door.
- Close the door: Zip the door promptly before sorting headlamps, snacks, or spare layers inside.
- Park wet footwear: Leave boots under the tarp or inside a vestibule, away from sleeping insulation.
- Stage rain gear: Keep shells, gaiters, and stove equipment in the covered transition zone.
- Use one access pouch: Store small daily items together so your main pack stays closed during showers.
Your tent interior should hold sleeping gear rather than damp camp clutter. That separation also makes condensation easier to identify because fewer wet items add moisture to the air around your bedding.
Condensation Management Separates Interior Moisture From Leaks
Droplets on the inside of a rainfly do not automatically mean a leak. Warm breath, damp clothing, wet ground, and still air raise humidity inside the shelter until water condenses on cooler fabric.
Moisture Patterns Reveal the Source
| Moisture pattern | Likely cause | Useful response |
|---|---|---|
| Droplets across upper walls | Condensation from humid interior air | Open vents and increase protected airflow |
| Water at a seam or zipper | Rain entry through a weak point | Inspect seam tape, zipper flap, and fly coverage |
| Wet floor edges | Runoff or exposed groundsheet | Check site drainage and footprint size |
| Wet patch beneath gear | Transferred moisture or wet equipment | Separate damp items from bedding immediately |
Ventilation is your main tool for condensation management. Open roof vents and protected door panels as weather allows, then pitch where a light breeze reaches the shelter instead of a humid enclosed hollow.
Dry air moving through the tent carries water vapor away before it settles on cold fabric. A tightly sealed tent may block wind-driven rain, yet closed vents trap breath and moisture from damp clothing.
Interior Habits Limit Moisture Transfer
Avoid pressing your sleeping bag or quilt against the inner tent wall. Pressure can move droplets through the fabric and turn a harmless film on the wall into a wet patch on insulation.
Carry a small absorbent cloth and wipe pooled droplets before bed. Your wet clothing belongs in a separate bag or beneath the tarp because drying socks beside your sleeping bag adds water vapor where you need warmth.
A dry inner wall does not prove that the tent has no leak, but a wet seam or zipper line points toward rain entry. Inspect those narrow wet tracks after the rain stops, then repair the weak point before the next trip.
When water has already reached your gear, prompt drying and triage can prevent a small leak from causing lasting damage.
Recovery Steps Limit Damage After Gear Gets Wet
Even a strong camp system has limits during several days of steady rain. Reserve dry sleep clothing for bedtime, then seal damp daytime layers away from your quilt, sleeping bag, and spare clothes.
Short Drying Windows Need Careful Priorities
- Sort damp items: Separate lightly damp base layers from soaked insulation, footwear, and shelter fabric.
- Air during breaks: Hang socks and gloves under the tarp during daylight gaps, away from direct flame.
- Use body heat sparingly: Wear a slightly damp base layer while moving or resting warm, not while trying to sleep.
- Protect dry reserves: Keep sleep layers sealed until camp is set and your shelter is ready.
- Change the plan: End the outing or seek a dry location after insulation becomes soaked and cannot regain loft.
Fire heat dries fabric unevenly and can melt coatings, scorch nylon, or send sparks into a rainfly. Keep your gear well back from flames, then rely on moving air beneath a tarp rather than trying to roast wet clothing dry.
Small clothing items respond better to body warmth and airflow than thick insulation does. A damp sock may dry during a hike, while a soaked down sleeping bag can remain cold and heavy through the night.
Post-Trip Drying Reveals Weak Points
At home, open tents, tarps, packs, sleeping bags, and footwear until every fold and seam feels dry. Persistent dampness causes odors, mildew, weakened coatings, and corrosion on stove parts or electronics contacts.
How to dry wet camping gear starts with air circulation around hidden areas: tent pockets, pack compartments, boot tongues, sleeping bag foot boxes, and folded rainwear. Spread items apart rather than leaving them in a pile where trapped moisture lingers.
To keep camping gear dry in wet weather on your next outing, inspect what stayed damp longest. A wet pack liner points to a closure problem, while wet floor edges point to drainage or tent footprint size.
Rain-Ready Priorities
Dry camping depends on layers that cover different failures. Elevated ground keeps runoff away, a taut shelter sheds rain, a pack liner protects the load, and dry bags isolate high-consequence items.
Your routine matters as much as fabric. Keep wet gear in the tarp zone, ventilate the tent, and protect dry sleep clothing as the reserve that carries you through a cold night.
The best way to keep sleeping bags dry while camping is to seal them inside a waterproof stuff sack within your pack liner. Keep your bag packed until the tent is ready, then keep wet shells, boots, and trail clothes out of the sleep area.
FAQ
How do you keep a tent dry inside when it rains?
Keep the rainfly taut, use a footprint smaller than the tent floor, and pitch above drainage paths. Vent the shelter through roof vents or protected door openings, keep wet clothing outside the sleeping area, and avoid pressing your bag against the inner wall.
Should you put a tarp under or over your tent?
Use a fitted footprint or groundsheet under the tent only with every edge beneath the floor. Put a separate tarp over a nearby cooking and gear area, not against the tent roof, and slope it so runoff moves away from your shelter.
How do you waterproof a tent before camping?
Inspect the rainfly, floor, guylines, and seam tape in daylight before departure. Apply seam sealer suited to the fabric where maker directions call for it, repair holes with matching patch material, and refresh water-repellent treatment on rainwear that no longer beads water.
What keeps a sleeping bag dry while camping?
Store your sleeping bag inside a waterproof stuff sack placed within a waterproof pack liner. Keep it packed until your tent is pitched, then change into reserved dry sleep clothing before getting in.
How do you dry camping gear after a rainy trip?
Open every item indoors or beneath cover, including tent pockets, pack compartments, boot tongues, and sleeping bag foot boxes. Hang or spread your gear where air can circulate, then check seams and folded fabric before storage.