
A dry campsite starts with keeping water away from your tent floor, rainfly, and insulation. Raised ground routes runoff aside, a taut rainfly sheds direct rainfall, and dry bags isolate sleeping gear. Your shelter stays drier where airflow limits condensation and wet clothing remains outside.
These rain camp setup steps cover site drainage, shelter tension, tarp placement, dry storage, leak response, and the weather hazards that mean you should leave camp.
Water Reaches Camp Through Six Paths
The ground, shelter fabric, and carried gear face six distinct water threats: direct rainfall, uphill runoff, groundwater, splashback, condensation, and moisture transferred from wet gear. Each threat leaves a different clue. Your response depends on whether water falls from above, moves across the ground, gathers beneath the floor, or forms inside the tent.
Direct rainfall strikes the rainfly and tarp shelter. Uphill runoff follows slopes and shallow channels, while groundwater rises through saturated soil beneath your tent. Splashback sends muddy droplets beneath a low fly edge, especially where hard-packed ground receives heavy drops.
Condensation starts inside the shelter. Your breath adds water vapor to enclosed air, and cooler tent fabric turns that vapor into droplets. Wet boots, sleeves, packs, and waterproof clothing layers bring another source indoors, where sleeping insulation can touch damp walls and wick moisture.
| Water source | What reaches camp | Practical response |
|---|---|---|
| Direct rainfall | Rain hits the rainfly and tarp. | Keep fabric taut and slope runoff away. |
| Uphill runoff | Water crosses beneath the tent floor. | Choose raised ground with visible drainage. |
| Saturated soil | Moisture presses against the floor. | Keep the groundsheet inside the floor edge. |
| Wind-driven splashback | Spray reaches doors and vestibules. | Turn doors away from strong wind. |
| Condensation and wet gear | Interior fabric and insulation become damp. | Vent the tent and isolate wet items. |
That order shapes your setup. Start with drainage, then tension the shelter fabric, then keep wet equipment away from your sleep system. A costly tent still fails where its floor sits in a puddle.
Ground Choice Keeps Runoff Away
Water follows gravity, and a mild slope can become a narrow stream after hours of rain. Place your tent on firm, raised ground where water has a route around camp rather than beneath it. A shallow rise works better than a flat depression that looks dry at dusk.
Site Clues Reveal Drainage Problems
- Raised shoulder: Set your tent on a slight rise instead of the bottom of a broad clearing.
- Firm surface: Favor packed soil, gravel, or short vegetation over ground that compresses deeply beneath your boot.
- Existing channels: Keep camp outside visible rivulets, worn drainage lines, and dry streambeds.
- Waterway distance: Camp well back from creeks, ponds, and riverbanks where rising water can reach your site.
- Overhead hazards: Stay clear of dead limbs, leaning trunks, and loose branches that wind can drop.
- Wind exposure: Use healthy trees or terrain as a buffer without sleeping beneath hazardous limbs.
Dry streambeds deserve extra caution. They can look level and comfortable until rain falls uphill, then runoff follows the same channel with little warning. Exposed ridges, isolated tall trees, and low ground also add lightning and water hazards during thunderstorms.
Do not dig a trench around your tent. Trenching damages the site, can violate campground rules, and does little against sustained rainfall. Leave No Trace principles favor moving to a better location before your shelter goes up.
Your campsite needs a visible escape route for water. Example: a grassy hollow can look harmless at 7 p.m., yet surrounding soil can drain into that low point before midnight. Moving your tent while the ground is still dry takes less effort than drying soaked insulation later.
With the site settled, tightening and staking the shelter before rain arrives prevents water from pooling on the fabric.
A Taut Shelter Blocks Rain Before Bedtime
Once runoff has a path around camp, your tent can work as a barrier instead of a basin. A three-season tent handles prolonged rain only where its seams, coatings, stakes, rainfly, and ventilation work together. Check those parts at home, not during a storm.
Tent Seams and Seam Sealer Need Inspection
Tiny needle holes along stitched seams can admit water, so inspect the tent and seam sealer before departure. Put seam sealer on worn or unsealed stitching after the fabric is clean and dry. Nikwax makes seam and fabric-care products, while many MSR and Coleman tents use factory seam tape that still needs inspection for peeling or cracks.
Hold the rainfly toward bright light and look for thin spots, flaking, or tacky coating. A damaged polyurethane layer can allow water through fabric that still looks intact. Zipper garages, stake loops, and fly attachment points also need inspection because wind pressure gathers at those areas.
The Footprint and Rainfly Serve Different Jobs
Your tent footprint must sit entirely beneath the tent floor and remain slightly smaller than that floor. An exposed groundsheet edge catches rain like a shallow tray, then routes water beneath your sleeping area. Fold excess material underneath before the tent goes on top.
Stake each corner, square the tent body, and tension every practical guy line. Tight guy lines keep the rainfly from sagging into the inner tent, where touching fabric can pass moisture inward. Leave a visible air gap along the foot end and windward side.
Rain-soaked nylon can loosen after a cold evening. Retension your guy lines before sleep, then inspect them after a hard burst of wind. That small adjustment is central to how to keep a tent dry in rain without pressing another tarp against the rainfly.
A Separate Tarp Keeps Wet Tasks Outside
The tent door becomes vulnerable once cooking, changing clothes, and sorting packs happen at its edge. A separate tarp shelter gives rain a place to land outside your sleeping compartment. Your vestibule stays less crowded, and wet gear has a covered place to drip.
Tarp Placement Protects the Living Area
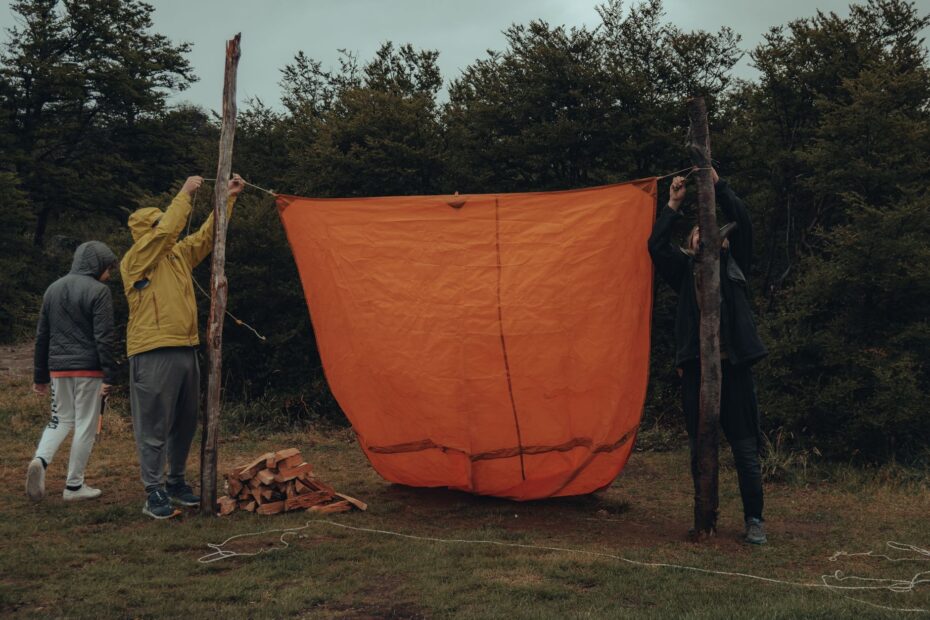
Set the tarp high enough for sitting or standing, then slope one side toward open ground. The low edge needs to drain away from the tent, walking path, and any dip in the site. A ridgeline between two sound trees works in wooded areas, while trekking poles suit open ground with secure anchors.
| Covered setup | Placement | What it protects |
|---|---|---|
| Tent rainfly | Over the tent body | The inner tent from direct rain and wind-driven spray. |
| Tent footprint | Under the tent floor | The floor from abrasion and damp ground contact. |
| Tarp shelter | Away from the tent entrance | The cooking area, boots, packs, and chairs. |
Do not drape a tarp directly against the rainfly. Touching fabrics trap moisture, reduce airflow, and can pass water through contact points. Your tarp works better as a separate roof with a clear drainage angle.
Keep fuel-burning stoves outside the tent and outside a sealed tarp shelter. Carbon monoxide and fire risk rise fast in enclosed fabric spaces, even during cold rain.
A camp kitchen tarp also limits transferred moisture. Hang your waterproof-breathable jacket, such as a GORE-TEX shell, where drip water falls outside the tent. Keep food preparation and dishwashing away from the sleeping entrance so wet sleeves and muddy hands do not carry moisture indoors.
Dry Storage and Ventilation Protect Sleep Gear
Wet gear changes the shelter from a rain barrier into a damp storage space. Your dry bags should hold sleeping insulation, spare clothing, electronics, maps, and medication because those items lose usefulness after prolonged moisture exposure. Layered storage gives your critical gear backup after a pack lid or zipper leaks.
Dry Bags Separate Critical Gear
- Sleeping bag storage: Seal your sleeping bag in a waterproof dry bag until the tent is fully pitched.
- Pack liner layer: Line the whole pack with a heavy-duty waterproof bag before loading clothing and insulation.
- Electronics pouch: Keep your phone, battery bank, and headlamp inside a small sealed dry bag.
- Vestibule storage: Leave wet boots, rainwear, and packs under the vestibule instead of beside your sleeping pad.
- Sleeping pad barrier: Use your pad to lift insulation above minor floor dampness and cold ground.
Moisture-wicking base layers move sweat away from your skin during sleep. Cotton holds water and cools rapidly, so dry sleep clothes should stay separate from hiking layers. Camping in heavy rain calls for one dry clothing set that remains sealed until bedtime.
Ventilation Reduces Interior Condensation
Your breath adds water vapor to a small tent through the night. That vapor meets cooler fabric and becomes condensation, leaving droplets on the inner wall. Open roof vents and protected door vents as rain direction allows, while keeping the sleeping area shielded from direct spray.
Ventilation does not solve water beneath the floor or a rainfly pressed against the tent body. It does lower interior humidity, which keeps your quilt and clothing farther from wet walls. This approach reduces tent condensation without leaving the shelter open to rain.
Condensation control limits internal dampness, yet a fresh leak demands immediate action before insulation loses its warmth.
Leak Triage Protects Insulation Before Repairs
A wet patch at 2 a.m. calls for calm triage rather than frantic repairs. Move your sleeping bag, dry bags, and electronics onto pads or toward the driest side of the tent. You protect insulation before tracing the source because damp down or synthetic fill loses warmth fast.
Contain Small Leaks and Find Their Source
- Lift insulation: Move sleeping gear away from the wet floor and rest it on pads, packs, or dry clothing bags.
- Check the fly: Retension sagging guy lines and restore the air gap between rainfly and inner tent.
- Trace water marks: Look for drips at seams, door corners, fly contact points, or water moving beneath the floor.
- Catch small drips: Use absorbent cloths beneath a drip, then wring them out under your tarp shelter.
- Shift stored gear: Keep dry bags and clothing away from the affected wall until daylight allows a fuller repair.
Condensation appears as widespread beads across interior fabric, while a seam leak forms a repeating drip below one spot. Runoff leaves wetness along the floor edge or beneath the tent. Your diagnosis matters because seam sealer cannot correct water entering beneath an oversized groundsheet.
Severe Weather Can Overwhelm a Tent
Leave camp or seek sturdier shelter where water is rising, a flash-flood warning covers your area, wind threatens the tent or nearby trees, or lightning intensifies. Rain camping tips need an exit plan because fabric shelters are not storm shelters.
Shivering that does not ease with dry layers, clumsy hands, confusion, and exhaustion can signal hypothermia risk. Put on dry insulation, leave wet clothing, and move toward shelter and help. You cannot stay dry while camping in heavy rain after essential insulation is saturated and weather keeps worsening.
Final Camp Check
Dry rain camping depends on a chain of choices. Elevated ground stops runoff, a taut rainfly blocks falling water, a separate tarp keeps wet work outside, and dry bags protect the gear that keeps you warm. Break one link and moisture spreads through camp.
Check drainage before staking the tent, then check fabric tension before sleep. Your final look should include exposed footprint edges, sagging guy lines, wet clothing inside the tent, blocked vents, and rising water near the site. Stay dry while camping in heavy rain by keeping water moving around camp rather than through your sleeping space.
FAQ
How do you choose a campsite that will not flood in heavy rain?
Choose firm ground on a slight rise, away from creeks, dry streambeds, visible runoff channels, and broad depressions. Your tent needs water to pass around the site rather than beneath the floor. Check overhead branches, wind exposure, lightning hazards, and campground rules before pitching.
Should a tent footprint be smaller or larger than the tent floor?
A footprint that extends beyond the tent floor can collect runoff, so keep it slightly smaller and fully hidden beneath the tent. An oversized groundsheet catches rain at its exposed edges and channels that water under your tent. Fold excess material underneath before placing the tent body on top.
How do you waterproof a tent before camping in heavy rain?
Inspect the rainfly coating, seam tape, zipper garages, stake loops, and attachment points before departure. Clean and dry the fabric, then put seam sealer on worn or unsealed stitching. Your inspection should also include guy lines and stakes because a sagging fly can transfer moisture to the inner tent.
What is a safe way to set up a tarp over a camp area?
Set a tarp shelter away from your tent entrance and angle its low edge toward open ground. Your tarp should cover cooking, boots, packs, and changing tasks without touching the rainfly. Keep fuel-burning stoves outside the tent and outside sealed tarp spaces.
How can you keep clothes and sleeping bags dry while camping?
Seal sleeping insulation, spare clothes, electronics, maps, and medication in dry bags before rain starts. Keep wet boots, shells, and packs under the vestibule or tarp shelter. Your dry sleep clothes should never double as wet hiking layers.
How do you reduce condensation inside a tent?
Open roof vents and sheltered door vents, keep the rainfly clear of the tent body, and store wet clothing outside the sleeping compartment. Your breath creates water vapor overnight, and ventilation lowers that indoor humidity. A flooded site or damaged seam needs a separate fix.