
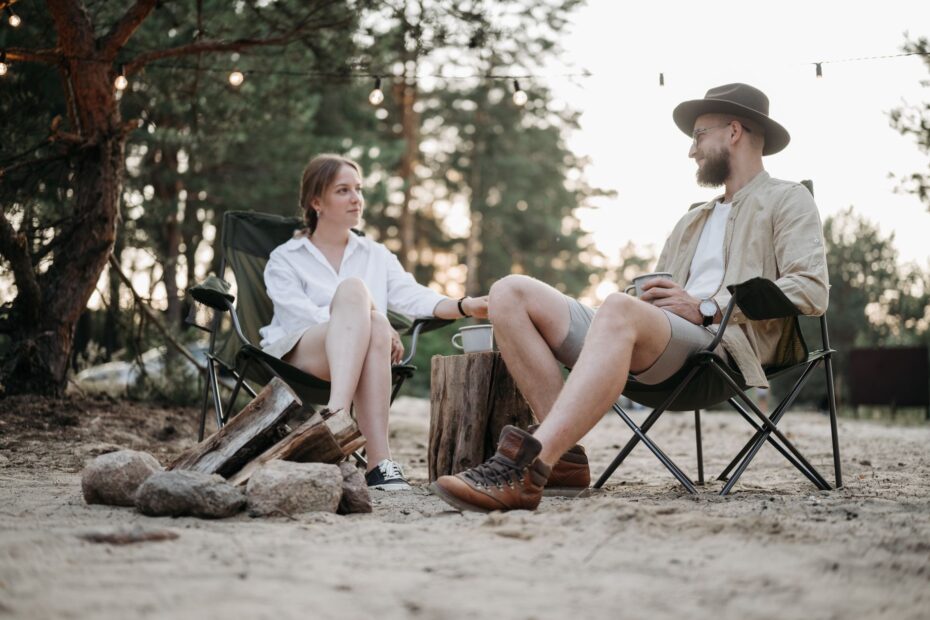
A dry tent, insulated bed, secure food area, and clear shared zones keep camp functional for several nights. A sound site keeps rain from pooling under bedding, keeps odors away from sleep space, and makes morning tasks calmer.
The sections below cover campsite selection, sleep, food storage, weather protection, and cleanup for your weekend, family stay, or weeklong camp.
A Durable Site Sets the Conditions for Every Night
Start with an established campsite that sits above obvious drainage paths and has no damaged trees overhead. Your tent stays drier on firm, level ground, while an established pad limits damage to vegetation and keeps camp activity within an area built for repeated use.
Flat ground alone is not enough. Shallow bowls, dry creek beds, and low edges can collect runoff during rain, while roots and stones press into your sleep system for hours. A few minutes of inspection can spare you a wet floor or sore back later.
Ground Conditions Shape Tent Placement
Walk the tent area before unloading your vehicle. Look for a level patch with enough room for the tent body, guylines, and a clear path to the door. Your sleeping area needs separation from the kitchen, fire ring, and vehicle traffic.
- Use established pads Pitch on an existing tent pad or hardened campsite surface rather than opening a new spot in vegetation.
- Check drainage paths Avoid shallow depressions, dry channels, and low edges where runoff can gather overnight.
- Scan overhead branches Move away from dead limbs, cracked trunks, and damaged trees that can shed branches in wind.
- Face away from wind Turn the tent door away from prevailing wind so your entry stays calmer during gusts.
- Clear sharp debris Brush aside loose needles and leaves to spot stones, cones, and sticks beneath the tent floor.
Keep your tent outside the fall zone of dead or damaged trees. Open sky above a tent is safer than brittle limbs overhead.
The National Park Service posts campground-specific rules for fire limits, bear storage, site boundaries, and vehicle placement. Check those rules before pitching your tent because a pleasant-looking spot still becomes a poor overnight site near wildlife routes, standing water, or falling branches.
After ruling out hazards, assign distinct areas before unpacking so damp, dirty equipment stays away from bedding.
Clear Zones Keep Shared Gear From Taking Over Camp
Once your tent sits on stable ground, divide the remaining space into sleeping, cooking, food-storage, and shared areas. Campsite organization works because each activity has a destination, so chairs, cookware, jackets, and toys do not spread across the only clear walking paths.
Place the camp kitchen downwind and apart from tents, subject to campground spacing rules. Food crumbs, steam, dishwater, and stove traffic stay in that zone, leaving your tent area quieter and less appealing to wildlife.
Zones Keep Camp Activity Separate
| Your zone | Your placement | Your purpose |
|---|---|---|
| Your sleeping area | Your quiet tent side | Your shoes, headlamps, water, and night layers stay within reach. |
| Your cooking area | Your downwind open space | Your stove and prep surface stay away from tent fabric and busy footpaths. |
| Your food storage | Your required storage point | Your scented items stay separate from sleeping gear and wildlife travel routes. |
| Your communal area | Your central shade space | Your chairs, lantern, and shared activities have a clear home. |
A family of four can place two tents along one side, a shade canopy in the center, and the kitchen at the far edge. That layout gives children room to move without crossing the stove area, while adults retain a view of tent doors from the seating space.
Your campsite organization ideas should include a return spot for every small item. Put cooking tools in one weatherproof bin, camp lighting and repair gear in another, and games or extra layers in a third. That pattern shortens morning packing and makes departure less chaotic.
Night Gear Belongs Beside the Tent Door
Your tent entrance works like a small mudroom. Keep a headlamp, rain layer, water bottle, glasses case, and medication in the same pocket or mesh organizer each night, so you are not digging through dark gear piles after bedtime.
A fixed door routine also helps children and tent mates find their gear without waking the whole camp. Put muddy shoes outside under cover, not inside the sleeping area, because damp soles add grit and moisture to bedding.
Keeping footwear and moisture outside protects bedding, while insulation beneath it prevents cold ground from draining body heat.
Reliable Sleep Starts With Ground Insulation
Order around the tent only matters after your body can rest on the ground beneath it. A sleeping bag slows heat loss to the air, but cold ground pulls warmth from your body through a thin pad during a long night.
Your sleep system needs three parts: a tent floor clear of pressure points, an insulated sleeping pad, and dry layers reserved for bed. Each part handles a different problem, from uneven soil to conductive heat loss to damp clothing.
Pad Insulation Sets the Nighttime Baseline
The coldest expected nighttime temperature should determine your sleeping pad’s insulation, not the warm afternoon forecast. Therm-a-Rest and other pad makers list R-values, which describe resistance to heat flow. A higher R-value offers more ground insulation for cold conditions.
Cold sleepers may need a higher R-value than warm sleepers in the same tent. Pair the pad with a sleeping bag suited to the expected range, then change into dry sleep clothes rather than wearing a shirt damp from hiking or sitting near a fire.
Small Bedtime Details Add Up
- Size the footprint Keep the tent footprint inside the tent edges so exposed material does not funnel rain beneath the floor.
- Vent the tent Open covered vents under the rainfly to move humid air and reduce morning condensation.
- Use stable head support Pack a compressible pillow or place clean layers inside a soft sack for steadier neck support.
- Stage night items Put your light, glasses, medication, and water in one fixed location beside your sleeping space.
- Reserve dry layers Keep sleep socks and a warm layer apart from daytime clothing that has absorbed sweat or rain.
REI and Coleman sell compact camp lighting, yet the useful feature is a low setting rather than a logo. Choose a battery lantern that gives your tent enough light for a map or zipper without flooding every sleeping space with harsh white light.
Dry sleep gear turns a nylon shelter into a usable bedroom. Your bedtime routine can stay under five minutes: place night items by the door, change into dry layers, check vents, and settle the pad before lights go out.
A Camp Kitchen Needs Separation, Cold Storage, and Cleanup Space
Meals become easier after cooking, washing, and food storage have separate surfaces. A defined camp kitchen setup keeps grease away from sleeping gear and gives your group a clear place for handwashing, cookware, and meal prep.
Set up a stove surface, a handwashing station, a dishwashing area, and a sealed bin for clean cookware. Keep fuel upright and away from flame. Place your water container near handwashing rather than beside raw food.
Cooler Management Protects Perishable Food
| Your cooler habit | Your result |
|---|---|
| Your drinks stay separate | Your food cooler stays closed longer and holds cold air more effectively. |
| Your raw meat uses leakproof storage | Your juices stay away from fruit, cheese, and ready-to-eat food. |
| Your ice packs fill gaps | Your cooler has less empty space for warm air to circulate. |
| Your menu uses perishables early | Your later meals can rely on shelf-stable ingredients as ice melts. |
Plan cooler access around your menu. Put the first dinner near the top, freeze water bottles before departure, and reserve a separate drink cooler for repeated opening. YETI and similar hard coolers can retain ice well, but a closed lid matters more than a brand name.
Bear-Proof Food Storage Includes Scented Items
Food storage includes more than snacks. Store food, trash, toothpaste, sunscreen, scented wipes, and cookware with residue in the bear-resistant locker, canister, or bear-proof food storage method required at your campground.
Never leave scented items in your tent. A tent is fabric, not wildlife storage, and crumbs in bedding can bring animals close to where you sleep.
The Leave No Trace Center for Outdoor Ethics promotes careful food handling because wildlife learns from easy meals. Your clean kitchen limits food odors near the tent and reduces the chance that an animal returns to camp looking for another meal.
Weather Protection Keeps Living Space Usable
Food and sleep zones work better after rain and wind stay outside them. A shade canopy or tarp over the shared area gives your group a dry spot for meals, cards, and wet-shoe changes without crowding the tent.
Overhead cover needs open sides and secure anchors. Enclosed tarp walls can trap stove heat and smoke, so keep cooking flames outside enclosed cover and follow campground rules for stoves, fire rings, and open flames.
Anchored Cover Handles Wind Better
- Stake every leg Secure each canopy leg to the ground so a gust does not shift the frame across camp.
- Tension guylines Pull lines firm enough to limit flapping, which wears fabric and tie points.
- Slope the tarp Set one tarp edge lower so rain sheds away from chairs, bags, and tent doors.
- Store loose gear Put maps, lightweight bags, and camp chairs under cover before wind scatters them.
- Separate wet items Keep damp boots under the canopy and spare clothing in dry bags or bins off the ground.
A tarp outside the tent footprint can cause a quiet but serious problem. Water runs across the exposed edge, collects beneath the floor, and leaves bedding damp even though the tent fabric has not leaked.
Mesh panels, long sleeves, and screened shelter walls help keep bugs away from seating and food prep. Your rain jackets need air around them to dry, so hang them beneath cover rather than sealing damp fabric inside a packed bin.
Daily Reset Routines Keep Camp Functional Until Departure
Windblown chairs and wet jackets become clutter within a single night. A 10-minute morning reset keeps small messes from turning into a packing-day search, and it gives your group a chance to check water, food storage, and changing weather.
Daily camp sanitation also protects shared surfaces. Wash cookware, wipe the prep area, and return clean items to their sealed bin after meals. Your kitchen stays easier to use because crumbs and damp towels do not build up around food.
Morning Tasks Protect the Rest of the Day
- Air damp gear Spread sleeping bags, towels, and rain layers in moving air before packing them into bins.
- Secure light items Stake or store chairs, lanterns, maps, and lightweight kitchen gear before weather shifts.
- Reset the kitchen Wash cookware, wipe the prep surface, and return dry items to the clean bin.
- Refill drinking water Check your remaining supply before breakfast rather than finding an empty container at dinner.
- Return scented items Put food, trash, and scented gear back in required storage after meals and snacks.
Natural water needs a campground-permitted method before drinking, cooking, or brushing teeth. Boiling, filtration, and chemical options have different limits, so follow product directions and local land rules for your water source.
Departure Starts During the Stay
Pack out trash as it appears, including twist ties, bottle caps, food scraps, and foil. Dispose of dishwater under local rules; some campgrounds direct you to a sink, while others require strained water spread away from campsites and water sources.
Your comfortable multi-day campsite setup stays pleasant because each item returns to its zone after use. Before departure, scan the ground from a low angle for microtrash, restore the site to its prior condition, and follow Leave No Trace practices.
Final Thoughts on a Longer Camp Stay
Comfort for several nights comes from control rather than excess gear. Give your tent dry ground, give food a separate secured home, give wet gear a place to drain, and give shared items a return spot. Your camp can then handle rain, meals, and daily activity without becoming a damp storage pile.
A practical multi-day camping checklist starts with the site, then moves through sleep, food, cover, lighting, water, and cleanup. That order reflects how camp problems spread: poor ground affects sleep, clutter slows meals, and loose gear turns bad weather into extra work.
FAQ
How do you set up a campsite for several days?
Start with an established, level site that has drainage and no overhead hazards. Put your tent in a quiet sleeping zone, place your kitchen apart from it, secure food in required storage, then reset wet gear, water, and cookware each day.
What do you need to camp comfortably for a week?
Your extended camping trip essentials include a weather-ready tent, insulated sleeping pad, sleeping bag, dry clothing system, camp chair, shade cover, stove, cooler, water container, lighting, food storage, and cleanup kit. Add water capacity suited to your campsite and group size.
How do you keep food cold on a multi-day camping trip?
Keep food cold by packing frozen items and ice packs tightly around perishables, limiting lid openings, and separating drinks from meal ingredients. Put raw foods in leakproof containers and eat the most perishable foods during the earlier part of your trip.
What campsite layout works for a family or group?
A useful group layout places tents in a quiet outer zone, a shared canopy and seating area in the center, and cooking and food storage farther away. Your walking paths should avoid the stove area, while night items stay near each tent door.
How do you organize camping gear at the campsite?
Use labeled bins for kitchen tools, clothing, repair supplies, and shared equipment, then return items after each use. Your gear system works because high-use items such as headlamps, water, and rain layers stay accessible rather than buried under spare supplies.
How can you make sleeping in a tent more comfortable?
Clear debris from beneath your tent, use a correctly sized footprint, and choose a sleeping pad with enough insulation for nighttime temperatures. Dry sleep clothes, a stable pillow, controlled ventilation, and a fixed location for night items make your tent more restful.