
To how to set up a campsite on uneven ground, choose the firmest legal patch with the mildest grade, keep your tent above runoff routes, and orient sleep gear across the contour or with your head uphill. A full tent footprint, secure anchors, and a test lie-down keep minor unevenness from becoming a wet, sliding night.
Campers facing rocky pads, hard-packed soil, or tilted ground can use these site checks, drainage choices, tent placement methods, anchoring options, and sleep-system adjustments for uneven terrain.
Choose a Site You Can Sleep On
A workable tent area feels stable beneath your boots and sleeping pad. Favor an established campground tent pad or bare, compacted soil where camping is permitted, since durable surfaces hold foot traffic better than grass, leaf litter, or loose duff.
Your site needs room for the full tent footprint, vestibule, guy lines, and a walking path that does not cross tensioned cord. This is how to choose a flat tent site: seek the least-tilted usable strip, not a perfectly level patch that may not exist.
Use Your Body as a Slope Gauge
Stand still on the proposed spot for 20 seconds, then lie down in your planned sleep position before unloading gear. Your ankles, shoulders, hips, and heels reveal a broad slope more clearly than a quick look from standing height.
A slight grade can work, but constant pressure against your legs or a steady drift toward one tent wall means the slope is too steep for a comfortable night. No universal degree marks every site as unsuitable; loose soil, hard ridges, rain exposure, and your pad surface change the decision.
- Favor firm soil. Choose compacted ground that stays solid beneath your boots and gives tent stakes a predictable hold.
- Reject loose rock. Rolling stones shift under body weight and create hard pressure points beneath your sleeping pad.
- Skip exposed roots. Tree roots and rocks can damage a tent floor while creating ridges that padding cannot fully soften.
- Avoid narrow crowns. A raised strip beneath the tent twists pole geometry and leaves each sleeper tilted in a different direction.
- Check full clearance. Leave enough open ground around the shelter for doors, vestibules, guy lines, and safe movement after dark.
Do not turn a steep pitch, unstable soil, or jagged rock shelf into a project. Move to another permitted spot, or use a hammock only where local rules and suitable trees allow it.
That relocation decision belongs ahead of any attempt to improve comfort. The Leave No Trace Center for Outdoor Ethics promotes durable surfaces because digging, cutting, and moving embedded natural features can leave visible damage after your tent is gone.
Leaving the site intact also means recognizing hazards rather than altering the ground to compensate for them.
Read Drainage, Wind, and Overhead Hazards
Firm ground still fails during rain where water has a path toward the tent. Walk uphill from the proposed site and trace shallow lines, low pockets, dry washes, gullies, and depressions that show where water runoff and drainage may concentrate.
A dry streambed can fill rapidly during a storm, and a tent at the base of a slope can receive runoff from far beyond its own footprint. Your tent belongs outside the flow path, not beside it or below a broad slab of rock.
Trace Water Before Pitching
Water follows gravity and gathers speed where a hillside narrows into a channel. A level-looking clearing below a granite outcrop can receive runoff from the entire slab above it, even though the ground beneath your tent looks dry at setup.
For example, shifting 15 feet sideways onto a gentle shoulder can place your tent outside the main water route. A tent footprint protects fabric from abrasion; it does not stop water moving downhill.
Look Uphill and Above the Tent
Dead branches, loose rocks, and exposed ridge lines carry more risk during gusts or rain. Check the weather forecast before raising poles, since a mildly sloped site with clear drainage may work in dry conditions but become unsuitable during heavy rain.
You should face the tent away from the strongest expected wind where terrain allows. REI Co-op, Big Agnes, NEMO Equipment, and MSR shelters include guy-out points for stability, but extra guy lines cannot make an exposed ridge site suitable.
Never dig a trench around your tent to redirect rain. Trenches scar the ground, and runoff can enter from a higher point than the trench reaches.
Once drainage, wind, and overhead hazards are clear, your next decision is slope orientation. The tent should follow the gentlest contour instead of forcing your body against the grade.
Set Tent Orientation Around the Grade
A mild side slope is easier to tolerate than a tent floor stretched over a hump or hollow. Set the shelter along the gentlest contour available, then test where each sleeper will lie before tightening corners.
This is the practical answer to where to pitch a tent on a slope: use the least-tilted strip that stays outside drainage routes. Keep the door on the more level side where possible, with no uphill channel aimed at the vestibule.
Sleep Across the Slope or Head Uphill
Cross-slope sleeping spreads the tilt across your body rather than sending your full length downhill. That position reduces feet-first sliding on a broad, gentle grade, though a stronger side tilt can press into hips and shoulders through the night.
Your head belongs uphill on a mild grade that still pulls your torso toward the footbox. Test this position with your sleeping pad and sleeping bag before staking every corner, because a slick pad surface can change how your body settles.
| Sleep position | Works well for | Watch for |
|---|---|---|
| Cross-slope | Wide, gentle grades with an even tent floor | Hip pressure on a stronger side tilt |
| Head uphill | Mild grades that pull a sleeping bag toward the foot end | Feet pressing against the tent wall |
| Head downhill | Few tent-sleeping situations | Body sliding toward the foot end and awkward head position |
Rotate the tent a few degrees only after drainage is settled. Your entrance can become easier to reach and less exposed to wind, yet water movement outranks door convenience.
Therm-a-Rest pads use textured surfaces, while Big Agnes and NEMO Equipment sell pad-and-bag systems meant to limit shifting. Those features help on a mild grade, but your slope orientation remains the main defense against sliding.
Protect the Ground Without Digging or Building
A pinecone under your shoulder can feel like a golf ball by midnight. Clear loose twigs, cones, and surface debris by hand, then shift the tent a few inches where a shallow ridge lands beneath a sleeper.
That small relocation is how to level a tent on uneven ground without digging. You are leveling the sleep experience, not reshaping the campsite.
Keep the Footprint Beneath the Floor
Before staking the corners, position the tent footprint entirely beneath the floor. Any exposed edge can collect rain and feed it under the tent body, especially where the ground pulls fabric outward.
Check all four sides after tensioning the tent. Uneven ground can shift a corner beyond the footprint even though the layout looked correct before poles were raised.
Leave Roots and Embedded Rocks in Place
Protect the site by avoiding excavation, vegetation cutting, root damage, embedded-rock removal, or natural-material padding beneath the floor. Those actions damage the campsite and rarely produce a surface that stays level under two sleeping bodies.
- Brush loose needles. Move only debris that could puncture fabric or form a sharp lump beneath your pad.
- Shift by inches. Reposition the tent before staking where one bump lines up with a hip, shoulder, or knee.
- Cover the footprint. Tuck every footprint edge beneath the tent floor before rain begins.
- Leave roots alone. Move your shelter rather than disturbing living vegetation or embedded ground features.
Leave No Trace principles draw a clear boundary here: a campsite should not show new trenches, cut roots, moved embedded stones, or built-up ground after departure. Your light-touch setup protects both the site and the next camper’s ability to judge the terrain honestly.
That restraint matters most when shallow soil limits conventional stakes and tempts campers to rearrange rocks.
Anchor the Tent in Hard, Rocky, or Shallow Soil
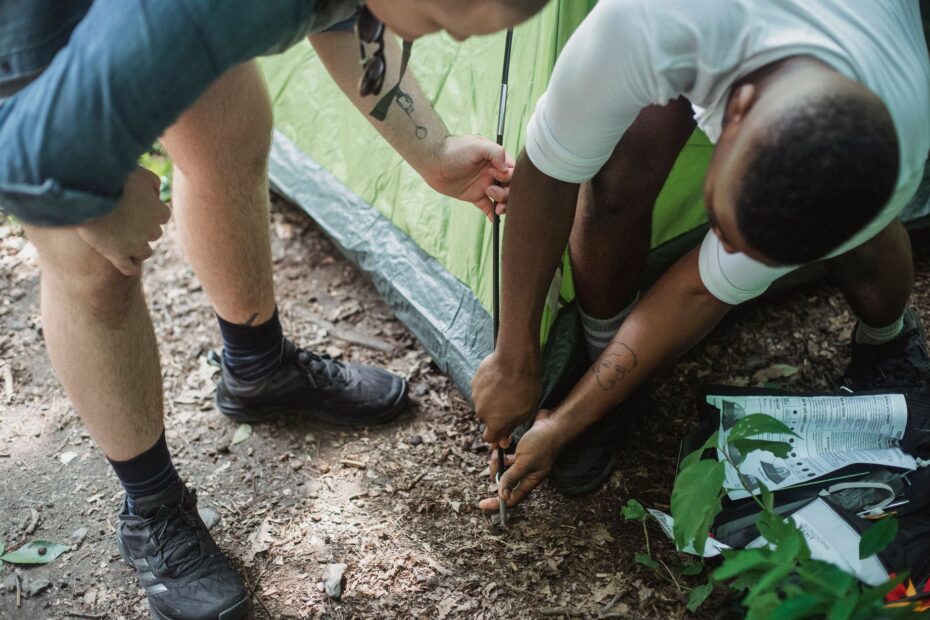
Raise poles and clip on the tent body before setting final tent stakes. Uneven ground can pull one corner lower than the others, and early staking locks that distortion into the shelter.
A warped pole arc sheds wind poorly and puts extra strain on fabric. Smooth panels and even tension show that your tent is sitting in its intended shape.
Set Stakes and Guy Lines With Even Tension
Place each stake at an angle away from the tent where soil accepts it. Adjust guy lines in small, even movements rather than pulling one corner drum-tight, since uneven tension can bind zipper tracks and twist the shelter.
| Ground condition | Anchor approach | Stop point |
|---|---|---|
| Firm soil | Angle stakes away from the tent and seat them fully | Stop before a stake bends against buried stone |
| Rocky soil | Shift the anchor point several inches until soil accepts the stake | Do not force metal into rock |
| Shallow soil | Run longer guy lines toward a stronger anchor position | Avoid loose stones that can roll under tension |
| Hard-packed pad | Use existing stake holes only where campground rules permit | Do not scar the tent pad surface |
Rock-assisted anchors work only with substantial rocks that cannot shift under load. Set the guy line around the rock, keep the line visible, and keep it outside a walking route.
Your guy line can attach to a strong natural anchor without harming vegetation or girdling a tree. A deadman anchor, meaning a buried object that holds a line in loose soil, belongs only where local rules permit and disturbance stays minimal.
Never stretch cordage across a trail or directly in front of a dark tent door. A low line becomes a shin-level hazard after sunset, even at a quiet campsite.
Improve Sleep Comfort Without Changing the Terrain
Minor unevenness belongs in your sleep system, not in a shovel hole. A thick sleeping pad spreads pressure across small bumps, while folded clothing beneath a calf or shoulder can soften a shallow low spot.
That is how to sleep comfortably on sloped ground without altering the campsite. Keep cushioning inside your tent, where it moves with your body rather than changing the ground itself.
Limit Pad and Bag Drift
Keep your sleeping bag centered on the pad and remove slick layers between them. A smooth nylon groundsheet beneath the pad or a rain jacket beneath the bag can act like a sled on a slope.
You can place heavier gear on the tent’s lower, less useful side where it does not press against the wall or block an exit. Gear should not sit under your body or beneath the tent floor.
For example, a pad with a grippy face plus folded fleece beneath your knees can make a gentle rocky site tolerable. A basketball-sized rock beneath your hip will not become comfortable through extra layers, so move the tent or relocate.
Use a Clear Relocation Test
Recheck the site before dark while moving remains simple. Persistent sliding, a painful pressure point, water headed toward the tent, or anchors that will not hold are four clear signs that the site has failed.
Your time is better spent moving 30 yards than spending eight hours braced against a tent wall. At camp break, restore only loose needles or twigs you moved and pack out cordage, waste, and every small item beneath the tent.
Final Camp Setup Checks
The skill behind how to set up a campsite on uneven ground is restraint. You work with a mild slope through careful orientation, a full tent footprint, firm anchors, and a well-arranged sleeping pad.
Walk away from poor drainage, unstable ground, severe tilt, and any site that demands digging or construction. Your dry, steady night begins with refusing to force a tent into ground that does not suit it.
FAQ
How much slope is too much for pitching a tent?
During a short lie-down test, excessive grade sends your body toward a tent wall, presses your feet into the foot end, or makes your sleeping pad drift. You should relocate from steep grades, loose soil, runoff channels, and surfaces where stakes cannot hold.
Is it safe to pitch a tent on a slope?
Firm ground outside runoff paths can support a tent safely when its anchors hold securely on a mild grade. You should avoid gullies, dry streambeds, loose soil, sharp crowns, and any grade that sends your body or sleep gear downhill.
Which direction should you sleep on uneven ground?
Cross-slope sleeping works well on a broad, gentle incline because it reduces feet-first sliding. Your head should sit uphill on a mild grade that still pulls your body downhill, but your pad and bag should be part of that test.
How do you level a tent without digging?
You level the experience rather than the terrain. Clear loose debris, shift the tent by inches around minor ridges, and use a thick sleeping pad with folded clothing beneath small low points.
Your next step is relocation where roots, embedded rocks, or deep hollows remain beneath a sleeper. Do not dig soil, remove roots, build up the floor, or move embedded stones.
How can you stake a tent on rocky, hard, or uneven soil?
Move the stake point several inches until soil accepts the stake, then tension guy lines evenly. Your guy lines can reach a stronger position in shallow soil, while substantial stable rocks can hold a line where local rules allow that method.
Do not force a stake into rock or rely on loose stones. A deadman anchor belongs only in permitted locations where minimal disturbance is possible.
Where should you avoid placing a tent when rain is expected?
Avoid depressions, dry washes, gullies, low pockets, and ground below a slope that can shed water toward your tent. Your tent should stay outside visible drainage lines, even where the weather is dry during setup.