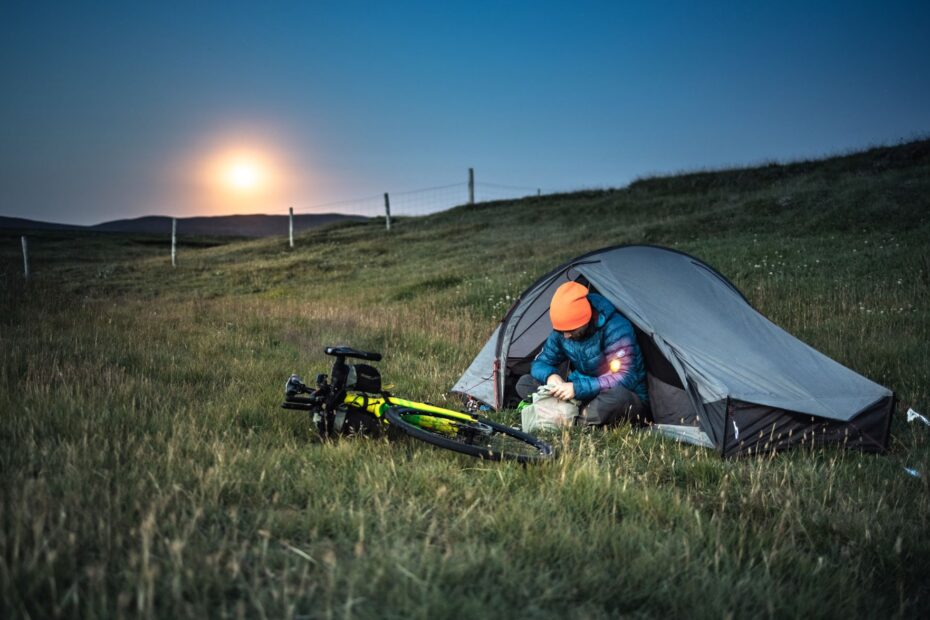
A solo camping trip refers to a short, planned overnight where you camp alone with familiar gear, a known route, and a clear way home. For your opening night, choose a developed campground, practice camp setup and tent pitching before departure, and share your location with a trusted contact.
This beginner solo camping guide covers site choice, weather forecasts, food storage and wildlife safety, emergency communication devices, and the routines that help you stay calm after dark.
Choose a Low-Pressure Place for One Night
One night reveals how your sleeping system, meals, and comfort level work without adding a long drive or remote route. A developed campground keeps restrooms, marked sites, nearby campers, and a direct vehicle route within reach, so your attention stays on basic skills.
Your opening solo overnight is safer at a developed campground with stable weather, familiar equipment, and a stated exit plan. That smaller scope gives you room to learn without turning a loose tent stake, cold sleeping pad, or missed turn into a larger problem.
Established campgrounds reduce unknowns
Marked campsites, posted rules, parking areas, and host contacts reduce the number of decisions waiting for you after arrival. A remote route adds navigation, water planning, weather exposure, and evacuation demands at the same time.
| Trip setting | What it gives you | What it asks of you |
|---|---|---|
| Developed campground | Marked sites, restrooms, nearby assistance, direct exit route | More voices, lights, and vehicle noise |
| Familiar local site | Known roads, terrain, and nearby services | Less novelty during your overnight |
| Remote backcountry route | More solitude and fewer built facilities | More route planning, water planning, and evacuation skill |
A familiar local site can work well because you already know the road layout and nearby services. Your goal is self-reliance with a reasonable margin, not an endurance test.
Set your no-go conditions before booking
Write down the conditions that send you home before your campground reservation begins. Severe storms, icy roads, illness, wildfire smoke, road closures, or a serious concern about the destination all justify changing plans.
- Storm warning, Leave the area or cancel the overnight when lightning, high wind, or heavy rain makes travel or shelter setup unsafe.
- Icy access road, Turn around when road traction no longer matches your vehicle, tires, or driving experience.
- Smoke exposure, Skip camp when wildfire smoke makes breathing uncomfortable or reduces visibility on access roads.
- Illness symptoms, Stay home when fever, nausea, dizziness, or weakness could make outdoor tasks harder.
- Route concern, Choose another plan when a closure, washout, or confusing detour leaves you without a clear exit.
Leave with the same discipline you use to arrive. A changed weather forecast or unsafe road is enough reason to head home.
That exit decision works because it removes pressure to continue after conditions have changed. Your vehicle, gear, and planned campsite remain available for another night.
With flexibility preserved, route and site details determine what should actually go into the vehicle.
Research the Campground Before Loading Your Vehicle
A reservation confirmation rarely shows the exact location of water spigots, restrooms, host sites, or road closures. Pull up the campground map before loading your vehicle, then mark the entrance, your site, bathrooms, water points, and the route back to the main road.
That map becomes more useful after dark, when a wrong turn can put you on an unmarked service road or at a closed gate. Keep a printed version in your vehicle rather than relying only on a phone screen.
Site rules shape your packing list
Campground rules can change your meal plan, water supply, arrival time, and food storage method. Review campground reservations through Recreation.gov, the National Park Service, or the U.S. Forest Service site managing the land.
- Arrival rules, Record your site number, arrival cutoff, parking location, gate code, and permit display requirement.
- Fire notices, A fire restriction can rule out a campfire or charcoal cooking, so bring meals that need no flame.
- Water status, Seasonal shutoffs mean your containers and water treatment method must match actual site conditions.
- Wildlife rules, Local instructions state where food, toiletries, cookware, and trash belong overnight.
- Road access, Gravel grades, snow, washouts, and construction can turn a short drive into a poor after-dark route.
Local rules matter because food, fire, and vehicle storage methods vary by location. Food storage and wildlife safety begin with the rules posted for your specific campground, not a habit learned elsewhere.
Use weather forecasts close to departure
Check NOAA forecasts again in the days before departure rather than relying on conditions from reservation week. Wind direction, nighttime low temperature, lightning risk, and expected rain matter more than the daytime high for your shelter and sleep system.
Your clothing and tent setup depend on those details. A calm 70-degree afternoon can still lead to a cold, wet night after sunset, especially at elevation or near water.
Operator alerts can reveal closed loops, damaged bridges, dry water systems, and wildlife activity. Leave home able to name your nearest exit and a nearby staffed location, not just the campground name.
Those local conditions turn a generic packing list into preparation for the problems most likely overnight.
Pack Gear Around Real Overnight Problems
A practical kit answers clear problems: rain, cold, darkness, thirst, hunger, navigation, and minor injury. Extra gadgets create clutter, while one missing headlamp can make a routine restroom walk difficult.
What to pack for solo camping depends on the campground rules, expected low temperature, water status, and your distance from the vehicle. Start with gear you have already set up and used in daylight.
Shelter and insulation hold heat near your body
Bring a tent, stakes, ground protection suited to that tent, a sleeping pad, and a sleeping bag or quilt suited to the expected overnight low. Your pad matters as much as your sleeping bag because compressed insulation beneath your body loses much of its warmth.
Practice camp setup and tent pitching at home before departure. Run the rainfly, stake pattern, zipper pulls, and headlamp in daylight, then pack all tent parts together so a missing pole does not appear at the campsite.
- Tent and rainfly, Use a shelter you can pitch without searching through instructions after dark.
- Sleeping pad, Put insulation between your body and the ground, which pulls heat away through contact.
- Warm sleep system, Match your sleeping bag or quilt to the expected nighttime low rather than the afternoon temperature.
- Headlamp and power, Carry a headlamp with spare batteries or a charged power bank for hands-free light.
- Dry clothing layer, Keep one dry layer for sleeping, since damp clothing can make a cool night feel colder.
The Ten Essentials cover common failures
The Ten Essentials group gear by survival function rather than brand name. Your kit needs water, light, insulation, food, navigation, sun protection, shelter, first aid, repair supplies, and emergency communication devices beyond normal cell service.
| Category | Practical one-night choice | Why it belongs in your kit |
|---|---|---|
| Water | Filled bottles plus a filter or purification backup | A campground water source may be shut off or unsuitable |
| Lighting | Headlamp with spare batteries or a power bank | Your hands stay open for tent, food, and vehicle tasks |
| Navigation | Paper map, compass, and offline phone map | Battery power and cell coverage can disappear together |
| First aid | First-aid kit with personal medications | You can respond to blisters, small cuts, or headaches |
| Repair | Duct tape, cord, patch material, and multitool | A loose strap or torn pad need not end your overnight |
Keep meals familiar for your opening night: oatmeal, sandwiches, trail mix, fruit, or a pouch meal you already know how to heat. A yard shakedown can reveal a stove fuel mismatch, a hard-to-open food pouch, or a mug that transfers too much heat to your hands.
Share a Clear Plan Beyond Your Phone
Maps and a charged phone help, yet neither forms your entire safety plan. Cell towers do not reach every valley, cold drains batteries, and a dropped phone can become unreachable at the exact moment you need it.
Your plan needs a person who knows where you are, where you intend to go, and when you expect to return. That information gives emergency responders a starting point should your contact report a missed return.
Leave a written itinerary with one trusted contact
Before departure, give one trusted contact a written itinerary. Include the campground name, site number where known, driving route, vehicle description, license plate, planned activities, and a firm return time.
A stated check-in time removes guesswork. For example, a Saturday 7 p.m. text can be casual, while no return confirmation by Sunday noon can mean your contact calls the campground office or local dispatch with your location details.
- Campground name, Write the full campground name and managing agency, not a nearby town alone.
- Site details, Add your site number, loop name, and reservation details where available.
- Vehicle description, List the vehicle make, color, license plate, and parking area.
- Travel route, Share the main road, planned turnoffs, and expected arrival window.
- Return deadline, State the date and time that should prompt a call for help.
Carry maps that work without cell coverage
Download offline maps before departure and carry a paper map plus compass. Gaia GPS can store offline map layers, while a Garmin inReach can send satellite messages outside cell coverage, though both need practice before a trip.
A missed check-in needs a stated response, not guesswork. Give your emergency contact the exact time to begin calling for help.
Keep the map where you can reach it without unpacking your whole vehicle. That same habit carries into camp, where daylight gives you the clearest window for site inspection and tent setup.
Set Up Camp Before Daylight Fades
Arrive with enough daylight to walk the entire site before unloading. A flat-looking patch can hide a drainage channel, ant activity, broken glass, or a dead branch above the tent.
Daylight gives you time to place your tent, identify the restroom path, and spot hazards around your vehicle. Darkness reduces depth perception and can turn a small site problem into an exhausting late-night task.
Look above, below, and around your tent
Use stable, well-drained ground and stay clear of dead or hanging branches, cliff edges, and low pockets where rain collects. Your tent door should face a clear walking path rather than brush, a drainage dip, or the vehicle lane.
Look for animal trails, scat, torn ground, or a worn route through vegetation. Wildlife awareness means giving animals space and keeping your sleeping area out of a travel corridor.
- Check overhead branches, Move away from dead limbs, hanging limbs, and trees with visible damage above your tent.
- Find firm ground, Use a level area that drains well rather than a low pocket where rain can pool.
- Face a clear path, Point your tent door toward open ground and an easy route to your vehicle.
- Avoid animal routes, Move away from trails, scat, and worn vegetation that suggest regular animal movement.
- Locate your exit, Walk the path to the road, restroom, and vehicle before darkness hides landmarks.
Store food and scented items under local rules
Secure food, scented toiletries, cookware, and trash exactly as site rules require. A bear locker, bear-resistant container, or vehicle storage works only where the local land manager permits that method.
Keep scented items out of your tent, even during a short overnight. That habit reduces food odors near your sleeping space and follows the food storage method set for the campground.
Fire care begins before the match comes out. Use an established fire ring, follow posted restrictions, keep water close, and skip the fire during a ban or high-wind period.
Use a Simple Evening Routine
Darkness makes ordinary objects disappear into the tent floor. Put your headlamp, shoes, keys, weather layer, water, first-aid kit, and navigation tools in the same spots each evening.
Your body settles more easily once it knows where the essentials are. A fixed routine reduces anxious searching and keeps a bathroom walk, weather change, or early departure from becoming a scramble.
Stage what you need before resting
- Review the forecast, Check weather forecasts, secure loose gear, and add a dry layer before temperatures fall.
- Store scented items, Put food, trash, toothpaste, and cookware into the required storage system before dusk deepens.
- Place exit items, Set shoes, keys, headlamp, water, and phone beside the tent door in fixed positions.
- Walk your route, Identify the restroom path, vehicle path, and campground exit while landmarks remain visible.
- Settle without force, Earplugs, a familiar audiobook, or slow breathing can soften normal night sounds around camp.
Fear after dark does not always point to danger. Wind in trees, distant voices, small animals, and campground vehicle doors can sound larger from inside a tent, so your staged essentials give you a calm way to check your surroundings.
Leave No Trace keeps campsites usable
Leave No Trace Center for Outdoor Ethics principles focus on careful travel, low-impact setup, respectful noise, and proper waste handling. Pack out every item required by the site, including food scraps and used hygiene items where no disposal system exists.
Leave sooner during worsening weather, illness, an unsafe person or animal situation, or a drop in confidence that no longer matches conditions. Ending a trip shows sound judgment, and your notes from that night can shape a more comfortable return.
Carry These Habits Into Your Next Overnight
Your solo camping trip does not need distance or hardship to teach useful skills. Choose a developed place, know its rules and exit route, practice the gear that keeps you dry and warm, and give another person your exact plan.
Those choices leave more room for the useful part of solitude: learning what you need after sunset and what you can handle calmly. Your next step can stay close to home until each routine feels familiar.
FAQ
Is solo camping safe for a new camper?
Solo camping can be a reasonable opening experience at a developed campground with stable weather, practiced gear, and a shared itinerary. Your safety improves when you avoid remote routes, arrive in daylight, follow wildlife storage rules, and leave promptly as conditions become unsafe.
Where should you go for a solo overnight?
Start at a developed campground or a familiar local site with marked campsites, a clear road, restrooms, and nearby services. Your campground reservation should include a site map, local rules, water details, and a direct route home.
What gear belongs on a one-night solo camping checklist?
Pack dependable shelter, a sleeping pad, a warm sleep system, water and treatment, familiar food, lighting, navigation tools, extra layers, a first-aid kit, repair supplies, and emergency communication devices. Your solo camping checklist should match the site water, weather, and wildlife rules.
How do you choose a safe campsite while alone?
Choose stable ground with drainage, clear overhead space, and a direct route to your vehicle or campground road. Keep your tent away from dead branches, flood-prone dips, cliff edges, and visible wildlife corridors, then store scented items through the site-required method.
What should you tell someone before leaving?
Share the campground name, site number where known, driving route, vehicle description, license plate, return time, and planned activities. Your contact also needs a stated time for calling the campground office or local dispatch after a missed return.
How do you stay safe around wildlife, weather, and nearby campers?
Follow local food storage rules, check weather forecasts close to departure, arrive in daylight, and keep your tent away from animal travel routes. Your vehicle keys, headlamp, phone, map, and weather layer should stay in fixed places near the tent door.