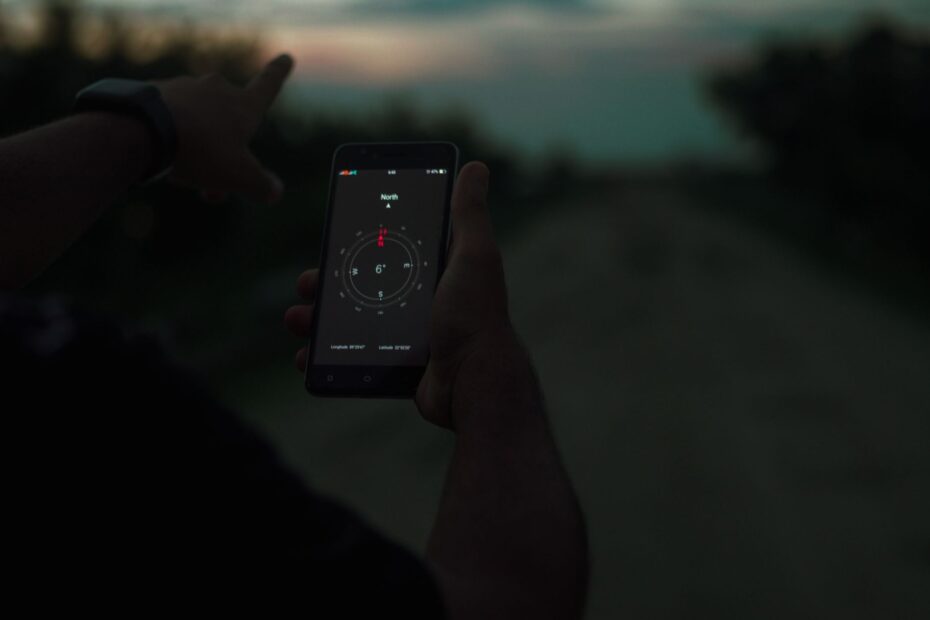
Downloaded map data lets your phone’s GPS work alongside paper maps and a compass when campsite cell service disappears. Your blue location dot can still move at a forest campground without cell bars, yet roads, contour lines, and site labels need saved map data.
You’ll prepare map files, campsite details, battery reserves, terrain references, and a calm response plan for wrong turns, road closures, or a lost phone signal.
Navigation Tools Still Work Beyond Cell Coverage
GPS Location and Map Data Work Separately
Your phone’s GPS receiver listens to satellite signals and can calculate your location without cellular data or Wi-Fi. GPS devices work in the same way under open sky. Stored map data supplies the roads, contour lines, campsites, and trails around that location.
Cellular data loads live map tiles, road closures, campground details, and search results. Wi-Fi can load similar information near a visitor center or lodge. Steep canyons, dense trees, cloud cover, and a drained battery can still limit your position display.
| Tool or signal | What it does for you | What it cannot do alone |
|---|---|---|
| Phone GPS receiver | Shows your location and GPS coordinates without cell bars. | It cannot show map areas your phone never stored. |
| Downloaded maps | Shows roads, sites, trails, and terrain without internet access. | Map files can lack live closure details or newly changed campground information. |
| Offline routing | Gives route guidance inside a stored map area. | It cannot account for an unrecorded gate, washout, or closed bridge. |
| Satellite communicator | Lets you send your location or an emergency message beyond cell coverage. | It does not replace map reading, a compass, or careful route judgment. |
A layered setup keeps every task from resting on one screen. Use offline maps for camping as your daily reference, carry paper maps and a compass as an independent backup, and pack emergency communication devices for remote trips where outside contact could matter.
Keep your paper map separate from your phone. A soaked pack, cracked screen, or drained battery should not remove every way for you to locate a road, trailhead, or campground loop.
Preparation Covers the Full Route Before Coverage Ends
Stored Map Areas Need More Than the Campground
The useful boundary starts before the campground gate. Your saved area needs to cover the last paved town, approach roads, campground loops, trail networks, parking areas, ranger stations, and two routes out. A map ending at the trailhead leaves you without direction during a detour.
Google Maps and Apple Maps suit stored road maps and town services. Gaia GPS and onX Backcountry show topographic maps, public-land layers, and tracks beyond pavement. AllTrails can store selected trail maps, though your saved area still needs the parking approach and return route.
Before departure, download maps for offline use across the entire travel corridor rather than only around the tent site. Pan across each access road and exit route while connected. That visual review reveals gaps before a missed turn becomes a long drive on an unfamiliar forest road.
Saved Places Remove Later Guesswork
- Reservation details: Save your confirmation, campground loop, site number, gate code, and check-in instructions on your phone.
- Camp location: Pin your campsite and record its GPS coordinates before walking away from it.
- Road choices: Mark road junctions, fuel stops, ranger stations, and two vehicle exit routes.
- Daily needs: Mark restrooms, water spigots, trash points, boat ramps, and parking areas you plan to revisit.
- Trail access: Save each trailhead, signed junction, bridge, and turnaround point before a hike starts.
- Emergency options: Mark the nearest paved road, staffed campground office, and a suitable pickup location.
You should rehearse every stored map in airplane mode before departure. Open the campground, pan past the access road, turn location services on, and confirm your dot appears. This catches the familiar error of viewing a map while connected without actually storing it.
Airplane mode gives your setup a realistic rehearsal. Your saved maps should open, your location dot should update, and your route should remain visible with Wi-Fi turned off.
Offline Maps and GPS Keep Campground Travel Simple
Waypoints Turn Familiar Ground Into Fixed References
A campground loop can look alike after sunset, especially around site 48, where similar trailers, pines, and side roads blend together. Your location dot on a stored campground map can show the right loop, site number, and footpath back to the vehicle.
Before leaving camp, mark the tent, vehicle, and nearest road junction as waypoints. Add a water source, trail junction, and safe road crossing during the day. Those saved points give you fixed references after rain, darkness, or a changed plan makes memory less reliable.
For example, a two-mile walk from a lakeside site to an overlook needs two return anchors. Mark camp coordinates and the signed junction at the trail start. On the return walk, your phone can show distance and direction to camp without internet access.
Battery Discipline Keeps Your Main Tool Available
Signal searching drains power because a phone keeps looking for a tower that could be miles away. Switch to airplane mode after your maps and pins are ready. Lower screen brightness and close camera, video, or music apps that draw power in the background.
Your power bank belongs in a dry pouch, away from cookware and wet clothing. Cold weather reduces battery output, so keep your phone and spare battery in an inner pocket during freezing nights. Reserve one charged device for emergencies instead of draining both phones on photos or entertainment.
A stored map is only useful while your phone stays powered. Keep charging cables with the power bank, not in a separate bag. That simple packing choice avoids a common camp problem: a full battery pack with no cable available at the moment you need it.
Digital tools reduce routine friction, whereas a map and compass remain usable when batteries, cables, or devices fail.
Paper Maps and Compass Skills Work Without Power
Orienting a Map Links Paper to the Ground
A current topographic map shows land shape, not only distance. Contour lines reveal ridges, saddles, steep slopes, drainages, and shorelines that remain visible after a phone quits. National Park Service and US Forest Service maps can show campground roads, boundaries, trail names, and local closure details.
Place the paper map in a waterproof case on level ground. Turn the map until its north edge points north with your compass. Then match visible ridges, streams, road bends, lake edges, and contour patterns to printed features until your position fits the ground around you.
Start with large features rather than a tiny footpath. A lake shoreline, broad ridge, or road bend gives you a stronger reference than one tree or an unsigned spur. Your position becomes clearer as three or four visible features agree with the map.
Declination Keeps Compass Bearings Accurate
A compass needle points toward magnetic north, while most maps use true north. The angle between them is magnetic declination. A bearing without the local declination can send you off line during a long cross-country walk.
Look at the declination printed in the map margin, then review current local information before a trip because the angle changes over time. A baseplate compass with a rotating bezel gives you a usable bearing in degrees, unlike a decorative keychain compass.
A bearing is most reliable when paired with landmarks that can confirm where the line should lead.
| Problem you see | Likely cause | Practical correction for you |
|---|---|---|
| Your terrain does not match the map. | The map faces the wrong direction. | Turn the map until north matches your compass, then match large terrain features. |
| Your bearing drifts from a trail. | Declination was skipped or set backward. | Reset the compass for local magnetic declination before leaving the trail. |
| Your location remains uncertain. | You relied on one feature. | Match a road, stream, ridge, and slope shape together to narrow your position. |
Terrain Clues Lead Back to Camp, Trailheads, and Vehicles
Handrails Keep Travel Tied to Visible Features
Ridges, trails, shorelines, streams, and roads act as handrails. A handrail is a visible feature you can follow, keeping your direction connected to the map. Walking beside a creek toward a bridge is safer than cutting through timber toward a vague point.
Your route should link handrails wherever terrain allows. A marked path from camp to a road, then a road to a trailhead, gives you repeated confirmation. Avoid open ground without a bearing, a clear destination, and a catching feature beyond it.
- Road bends: Use sharp bends as location references before entering a campground loop or side road.
- Water edges: Follow a mapped shoreline only where safe footing and shoreline access allow travel.
- Marked trails: Use signed trail segments to connect camp, parking areas, and trailheads.
- Ridge lines: Match broad ridges to contour lines before heading across open terrain.
Attack Points and Catching Features Limit Overshooting
An attack point is an obvious landmark close to a hard-to-see destination. Use a signed junction, bridge, sharp bend, or water crossing as the place where the short final approach begins. This removes the guesswork of hunting for an unmarked spur trail from half a mile away.
Set a catching feature beyond your target before leaving the attack point. A creek, lake edge, road, or major junction tells you that you have gone too far. Stop there, review your map and waypoints, then return to the last certain point instead of wandering farther.
For example, your campsite sits 150 yards north of a road bend beside a small creek. The bend becomes your attack point, and the creek becomes your catching feature. Reaching the creek without seeing camp means your route needs review before more travel.
When those checks reveal a mismatch, limiting movement prevents a small navigation error from becoming a larger search area.
Disorientation Calls for a Calm, Limited Response
Stopping Protects Your Last Known Point
The moment your location stops making sense, stop moving. Mark your last known point, then review daylight, weather, water, warmth, group condition, and available tools. Fast movement under stress turns a small error at one junction into a much larger search area.
Backtrack only along a route you can identify with confidence and only during safe light, weather, and group conditions. Travel after dark, across steep ground, or through rising water adds hazards that a phone screen cannot solve.
Your last known point is more valuable than a guess. A marked road junction, signed trail intersection, or waypoint beside camp gives your group a clear reference for a return route or an emergency message.
Clear Thresholds Reduce Improvised Choices
- Stay put near dark: Remain at a visible, sheltered location after safe travel time has passed.
- Contact camp staff: Reach the ranger station or campground host after a missed return time or blocked road.
- Use a whistle: Signal three short blasts, pause, then repeat because sound carries farther than your voice.
- Send location details: Use your satellite communicator to share GPS coordinates and the nature of the problem.
- Protect vulnerable members: Stop sooner with children, injury, cold exposure, or limited water in the group.
Garmin inReach and similar emergency communication devices can send preset messages, location points, and emergency alerts with a clear satellite view. They need battery power and careful message details. State your coordinates, group size, injury status, weather, and planned action.
How to navigate without cell service while camping comes down to restraint as much as equipment. Your map, compass, waypoints, whistle, and contact plan work together after you stop adding distance to an uncertain route.
Final Thoughts
Your phone remains useful beyond cell coverage because GPS and stored maps are separate tools, yet neither replaces preparation. Save the full travel area before departure, record camp coordinates, carry a working compass and paper map, and pause at the first sign of uncertainty.
A calm stop near a known landmark is safer than a confident-looking wrong turn. Your preparation also gives camp staff or emergency contacts clearer details should your route change unexpectedly.
FAQ
Can GPS work without cell service?
Yes. Your phone or dedicated GPS device can calculate location from satellite signals without cellular service, as long as it has adequate sky view and battery power. You still need downloaded maps to see roads, trails, site numbers, and terrain around your position.
How do you download maps before going camping?
Open your chosen map app while connected to Wi-Fi, select an area larger than your campground and hike, then store it for offline access. Put your phone in airplane mode afterward and pan from the approach road to camp, trailheads, parking areas, and exit routes.
What offline map app fits camping trips?
Google Maps or Apple Maps suits stored driving routes and nearby towns. Gaia GPS and onX Backcountry suit terrain, land boundaries, and off-pavement travel. AllTrails suits a saved hiking route, though your stored map still needs to reach the parking area and return route.
How can you find your campsite without internet?
Save reservation details, pin your campsite, and record GPS coordinates before leaving camp. Use your stored campground map to follow the correct loop, then use the phone’s location dot, road junctions, and nearby landmarks to confirm your site rather than relying on memory.
What backup works after a phone battery dies or a screen breaks?
A paper topographic map and a working baseplate compass remain available after battery loss, screen damage, or failed downloads. Keep them in a waterproof case separate from your phone. A satellite communicator adds outside contact where a clear satellite view is available.
How do you use a compass and paper map at a campground or on a trail?
Turn the map until its north edge matches your compass, then match large features such as roads, shorelines, ridges, and streams. Use a signed junction or road bend as an attack point, take a bearing for the short final distance, and set a creek or road beyond your target as a catching feature.